This last weekend my husband
celebrated his 30th birthday. Since this birthday is such a
milestone in a person’s life, I knew I had to do something awesome. One thing
led to another (read hours spent on Pinterest and aimlessly searching Google
for 30th birthday ideas), and the answer came to me: Zombies! We are
both huge zombie fans (My husband even has a zombie tattooed on his arm!), so I
knew this was the way to go. I realized immediately that the cake was really
going to make or break this theme, and what does any self-respecting zombie eat
on his birthday? Brains of course!
Now here is where I had to get
creative. Brain cakes aren’t exactly normal stock at a grocery store. I am a
high school English teacher by trade, which means I have very little time to
experiment with and hone my baking skills. If my life stats could be displayed
as they are in the MMORPG’s I play in my spare time (Ha! Spare time, that’s a
good one…), my XP for baking would be embarrassingly low. In this area I would
definitely wear the label “casual.” But I was determined, my husband would be
eating brains for his 30th birthday, and they were going to be
delicious!
Fast forward through more aimless
hours on Pinterest and Google search, and cut to these two wonderful websites
made by women way more talented than me when it comes to experiments in the
kitchen:
I read these two posts, and while I
may not have the highest skill set when it comes to baking, I thought to myself,
“I could do that.” I have never even so much as melted chocolate before in my
life, nor had I baked a cake from scratch. But I had made cupcakes from scratch
before, from a very specific recipe, how hard could this be?
I started by buying the mold for the
mini-brain treats. ThinkGeek is always my go to website for anything awesome. I
swear, my husband and I could meet every need we ever have just by shopping on
this site. I ordered the Brain Freeze ice-cube mold, and because I had
ThinkGeek points to spare, I threw in the Millennium Falcon mold as well (what
self-respected nerd wouldn’t want a Millennium Falcon cake ball?) Neat fact
about all these fancy ice-cube molds, most of them can be used as chocolate
molds too, who knew? I do now, and so do you! You can buy them here:


Next, I needed the mold for the
main attraction, the large brain! I found a jello mold on Amazon.com for pretty
cheap. While it is intended for use with jello, this mold also holds up when
used with chocolate. I feel my XP rising already. Here’s what I bought:

With all my molds ready to go, it
was time to get to the actual experiment, I mean, baking. I gathered my
ingredients. I bought three bags of Ghirardelli's white chocolate chips, one
can of cherry pie filling, food coloring, and all the standard ingredients
needed for a standard white cake and chocolate frosting (It’s what my husband
likesJ).
Here’s a picture of the baked cakes and chocolate frosting. I wanted to make
the cakes red, but I apparently picked up a box of neon food coloring, so pink
it was!

Here are the recipes I used for the
white cake and chocolate frosting:
Once I had the cakes baked and the
chocolate frosting ready to go, I broke up one of the nine inch rounds into my
mixer and threw in some of the delicious frosting in order to make the brain “cake
ball” mix. I’m sure there’s a measurement that goes with this, but I’m a big
believer in learning by experimentation, so the super scientific measurement of
frosting I threw in with the cake is “some.” Then, “some more” just for good
measure J


Then I mixed it all up until it
looked nice and blended. It really only took a minute. The main goal here was
to make sure it’s blended enough so I could take it out and roll it into little
balls to fit into the brain mold. I think in the future I would start with a
little less frosting and then add as needed. XP rising all the time.

Now that I had everything ready to
go, I began on the scariest task of all, melting chocolate. After reading tons
of how-tos online, I decided to go with the over the stove method of melting
chocolate. I felt I would have more control over it, plus I thought it just
made me look cooler than using the microwave J
All this consisted of was putting about an inch of water in a pan and placing
one of my mixing bowels above it. One tip I read over and over again is that the
water in the pot below should NOT reach a boil. I had many freak out moments of
boiling water. Apparently it doesn’t ruin the chocolate if it reaches a boil,
just make sure it’s turned down again quickly. Look at my XP fly!


I stirred constantly in fear of burning
the chocolate. Once it was all melted, it was time for the fun to really begin!
I had the mini-brain mold standing by and began filling the tray making sure to
cover all the sides.

I placed these in the freezer for about five minutes in order to let them harden. When I brought them back out, I put the cherry filling in the newly hardened brains. The cherries seemed to be too big for what I was going for (Gooey redness oozing out of the brain once bitten) so I just used the filling in the can, minus the big cherry chunks.

I grabbed handfuls of the cake ball
mix already prepared and squished in it to fill up the rest of the space of the
brain mold.

I covered the top with the
remainder of the white chocolate and placed it back in the freezer for five
minutes. After checking on it, I left it in for another five minutes for good
measure. When I brought them back out, I had a nice heart attack moment when I
realized I had forgotten to spray the mold with the awesome baking spray I
bought for that very purpose. I crossed my fingers, held by breath, and began
to twist the mold to loosen the mini-brains I had worked so hard to achieve.
Here’s the result:

Success! The ice
cube try made it surprisingly easy. I gave myself a five second break to run upstairs
and get a high five from my husband, then returned to the kitchen to tackle the
center piece of this birthday celebration, the large brain cake. I followed
much of the same routine for the large brain mold, only this time I remembered
to generously apply the baking spray to the brain mold before beginning. I
melted more white chocolate and coated the inside of the mold. I started with a
thin layer, placed it in the freezer for five minutes, spread another layer of
chocolate, more freezing, and then more chocolate, until I was sure the entire inside
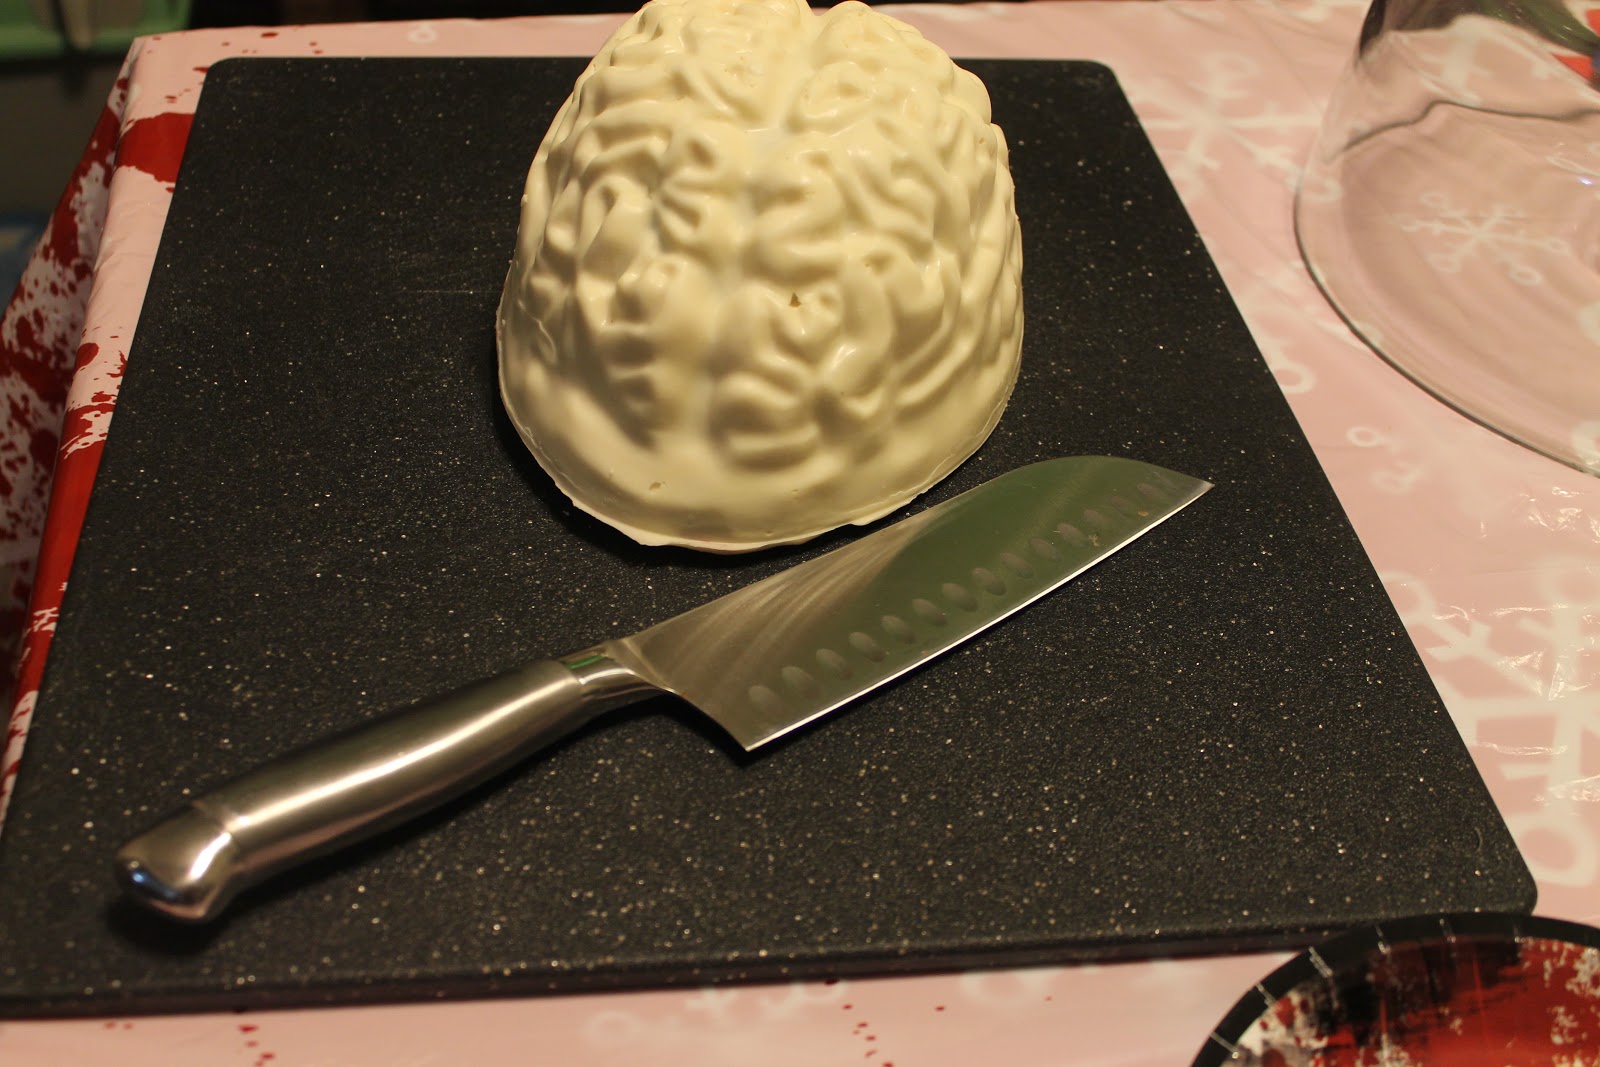
was covered and stable. After a quick wish on a star, and with breath held, I
flipped the mold over… and a chocolate brain mold was born!

The chocolate brain was placed back
in the mold, filled with the home made chocolate frosting, squished full with
the second 9” baked cake, and covered with more melted white chocolate. It went
in the freezer for about ten minutes.


And the
final result!


My
husband was very impressed J
That’s
what I call a successful 30th Birthday of the Dead!

This whole experience has taught me
to trust my instincts more when in the kitchen. As the wise Master Yoda once
said, “Try not. Do. Or do not. There is no try.” I went into that kitchen armed
with recipes and research and a determination to give my husband one awesomely themed
Zombie birthday, and I wasn’t leaving until I had succeeded. Luckily, I reached
all of my goals on the first go, and received many high fives from my amazingly
supportive husband. But I was also prepared with a backup plan had everything
gone wrong. Are you ready for it? It’s called extra ingredients and a full day
with nothing else planed! If things fell apart, I was prepared to do it as many
times as needed until I reached the results I wanted. Usually my busy teacher
schedule doesn’t allow for this, but I am lucky enough to have this holiday
week off. Coruscant was not built in a
day, and neither will my baking skills be leveled up with this one experience. And
that’s fine by me. I look forward to continuing my experimentation down any and
all nerdy paths that catch my fancy. This birthday was an epic win and I swear
I could feel my baking XP growing with every success. I can’t wait until next
year, I already have many nerdy themes brewing J
I would love to learn about more
zombie themed recipes so that when this theme is inevitably revived in my
household at a future date, we can have even more delicious zombie fun! Feel
free to post ideas in the comment section below. I look forward to reading all
the creative ideas J
I am so impressed! Not only by your amazing brrraaaaaaiiiiiiinnnnnsss baking skills, but your writing skills as well! Witty, entertaining, informative, it had it all! Loved this little gem in particular: "I’m a big believer in learning by experimentation, so the super scientific measurement of frosting I threw in with the cake is “some.” Then, “some more” just for good measure." That's actually pretty darn scientific if my lab days are anything to judge by.
ReplyDeleteI think you have a very bright future as an incredible baker and blogger! Your awesome nerd references kept me giggling, your yummy photos kept me drooling, and over all you had me wanting more! Welcome to the blog-o-sphere. You're one of us now. :-)
Your comments always leave me energized and wanting to write more. Thanks for being awesome! Now I'm going to have to come up with some awesome theme for your upcoming birthday... :)
DeleteVery impressive...kinda gross...but very impressive!! I know Keith loved it! You are so creative!
ReplyDeleteThank you for the kind compliments. Keith did love it!
Delete